Cheryl brought me this lovely quilt top she made for a wedding gift. She just wanted me to stitch in the ditch, which was a great choice, keeping it very simple and not-too-feminine. For her second-only quilt, Cheryl did a great job of keeping things square!
The wedding couple picked out the colours, I believe the plum colour represented the bridesmaids dresses, the black for the men's tuxedos and the white of course, for the bride's dress.
I loved the way she used a photo of the couple in the center of the quilt. There were two lovely, machine-embroidered filler pieces on either side of it, as well.
Surrounding the photo were blocks of many well-wishes provided by the wedding guests.
Joy brought me this darling quilt top she made for her granddaughter Madison, who is now 5 years old. She wanted to get it quilted up before Madison outgrew it!
It was alot of fun to do and gave me a chance to try out a few different background fillers.
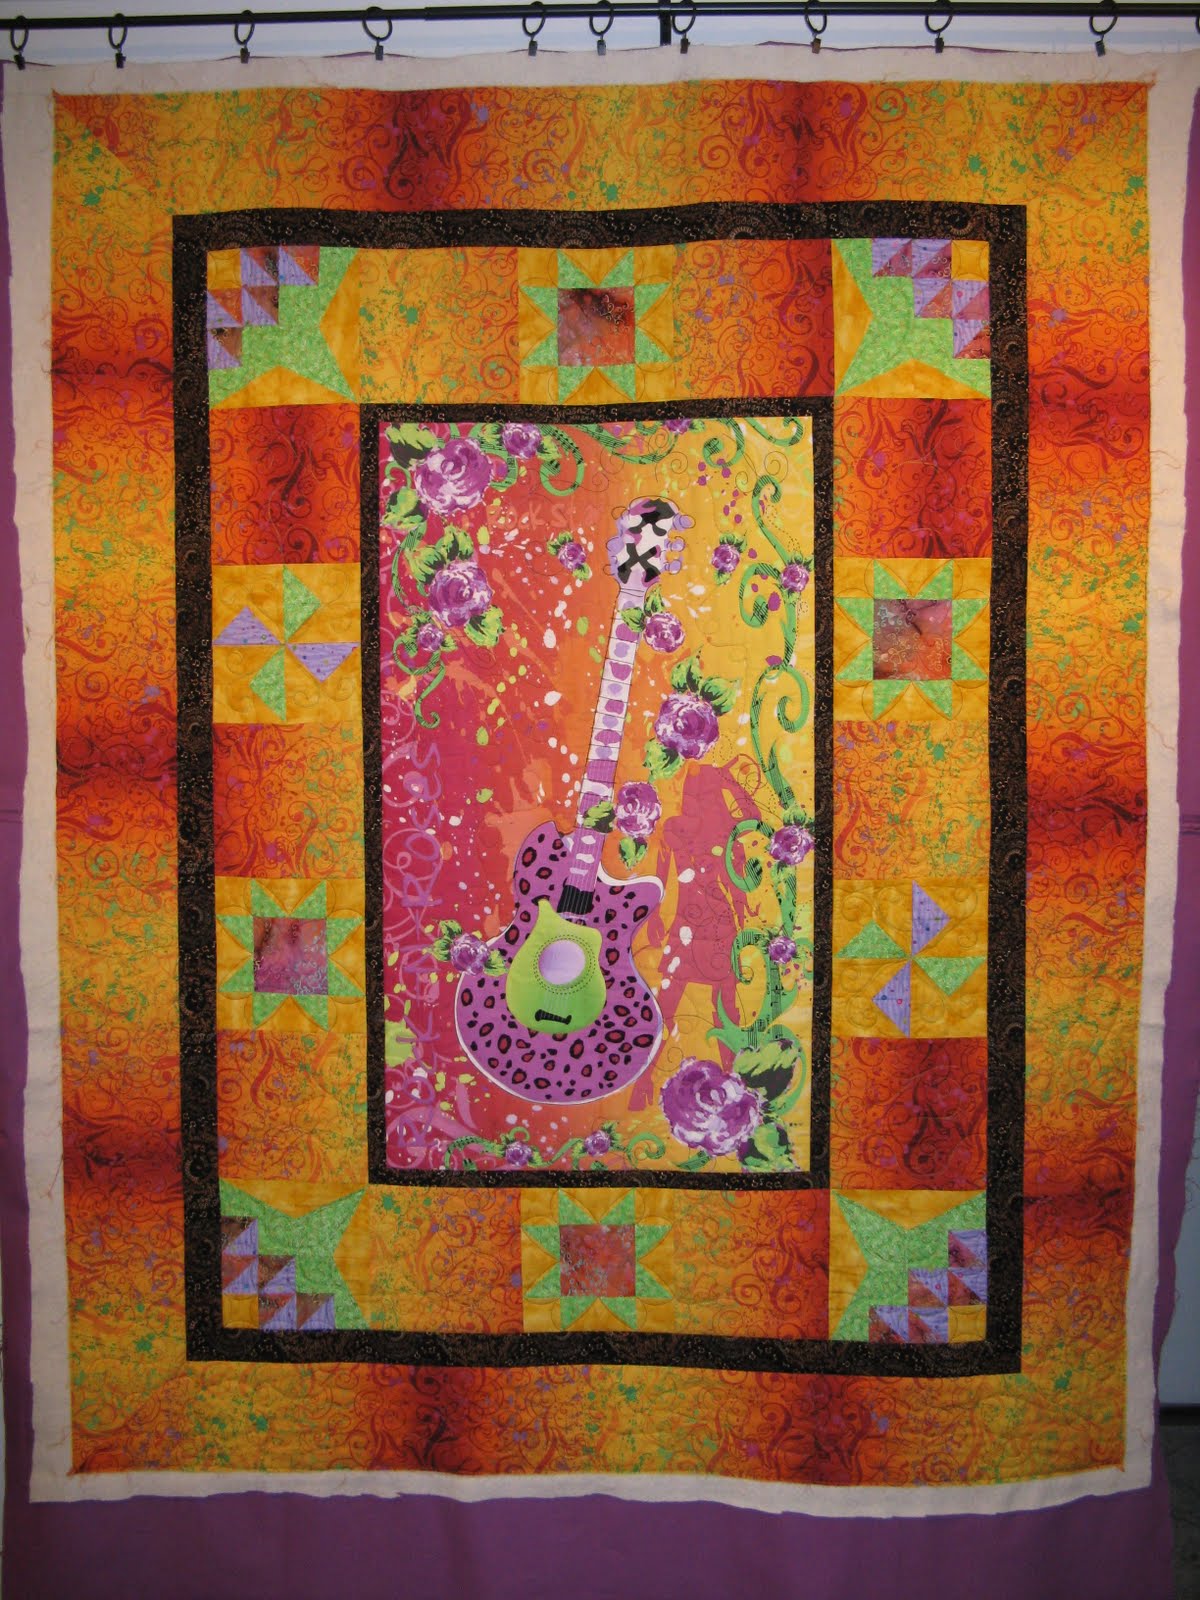
Velda brought me this quilt she made for her niece. I just fell in love with the fabric!
The inside panel is from a Lyndhurst Studio, (Northcott) line, called Rock-N-Roses. The fabrics Velda chose to accompany the panel were amazing, and suited the quilt perfectly!
I started by stitching in the ditch between all the blocks.
In the panel portion, I loosely free-handed around the shapes and
added some swirlies and loops with variegated thread.
In the surrounding blocks we chose to do some basic quilting, according the the block style.
In the border, I stitched some musical notes and loops, although it doesn't show up in any of the photos.
It was a fun quilt to work on, and has sent me on a mission to find some more fabric!
Since the word "Garden" shows up in the title of my blog, I feel that I can stray alittle from the Quilting theme.
While staying at the family cottage during the summer, my husband and I often go for walks along the forestry backroads. I'm always looking into the ditches and finding disgarded items from people who couldn't be bothered to take them to the dump, and I've come home with a few treasures that aren't just pop and beer cans!
This one trip I found an old oak barrel, and nearby, a broken pressure-treated post, possibly fallen off someones vehicle, or thrown out, but hey, finder's keepers is my motto!
I went back with the Jeep and and hauled out my treasures and took it back to the cottage where I did the water test, and filled the barrel up to see how much it leaked. It did pretty well! Just with leaking alone, the water could last a week.
So, the next week or so I gathered up some supplies and proceeded to turn it into a drip system for our tiny garden at the cottage.
Since we don't have power at the cottage, I got a chance to use some old hand tools!
First I drilled a hole with a hole saw bit just big enough to put the tap threads through.
Then I used a bigger hole saw bit to make a bigger circle on the inside of the barrel, because the threads on the tap weren't long enough, or the barrel was too thick, so I had to make room for my coupler thingy to screw onto the tap.
I actually drilled for two taps, one at the bottom to feed the drip system, the other near the top just in case I re-route the downspout into the barrel, "rain-barrel" style, and then this second tap would be the overflow.
Also, I must mention that I gooped a bunch of silicone sealer on the inside as well.
Next, I put together the poly fittings. Don't forget to put the clamp on the pipe before you attach it to the fitting! Ask me how I know!
Oh, and I forgot to mention the pressure-treated post, I sawed it by hand to the required length, and set them under the barrel so there's some air circulation under it.
This photos shows the barrel is wet, not because it is leaking, but because I showered it with the hose.
Here's the lower tap.
Here's a little dripper doing it's thing.
And here's the little garden, there's a cherry tomato plant, a few peppers, some basil and chives, and some volunteer plant in the foreground. I had hoped it was a cucumber, but Father-in-Law suggested it might be a cantaloupe. It will be fun to see what it turns out to be!
I want to let everyone know that I DID IT ALL BY MYSELF!
But to be honest, I had a hard time putting in those little drippers, so my husband did assist with those. But that's all he did!
Well, like many of the other bloggers out there, I'm having a hard time finding time to write, with the wonderful summer weather we are having.
For the past month or so, my routine has been:
Wednesday and Thursday- go to work, Thursday night guild meeting if I have time
Friday- pick any veggies or berries off the garden, water flowers, pack for the weekend at the lake.
Saturday, Sunday, Monday- enjoy the weekend at the cottage.
Tuesday- come home and do laundry, pick stuff off the garden, water flowers, do any housework.
Then start all over again with going to work for 2 days.
I haven't been quilting much at all for customers, although there are a couple of them I should think of starting soon!
I have started another quilt project of my own, a Grandmother's Flower Garden. It has been a great take-along project and I'm enjoying it so much.
This is the fabric that inspired me.
I found the hexagons patterns on a website with free graph paper. www.PrintablePaper.net is a really cool site, I will be using it alot!
Then I printed some sheets of hexagons onto 8"x11" sticky label paper.
After I cut out the hexagons, I peeled and stuck them to my fabric, 6 petals and one center of a different colour.
Then I cut around them about 3/8".
Next I basted down the corners, taking an extra little stitch in the corner itself and then a traveling stitch to get to the next corner. Note: I did NOT go through the sticky label paper to the other side.
Then, I proceeded to stitch each petal to the flower center. I don't know if it was necessary, but I always placed a straight grain against a bias edge, just to give it extra stability. It doesn't work out for the sections in between the petals.
Once all the petals were secured to the center, then I stitched in between the petals one at a time.
Here is how the flowers look in relation to the focus fabric.
I may make some flowers out of the floral fabric as well, and see how that looks.
I also plan to make some white daisies.
I will use the multi-green fabric and join the flowers in the variety of greens, resembling leaves.
I don't know how big this quilt will be, all I know is that I still have alot more flowers to make! I hope summer lasts a long time!
Valerie brought me two quilt tops she made for her parents.
They recently celebrated their 50th Wedding Anniversary and she wanted to give them something special to mark the occasion.
The Father's one has more blue in it while Mom's is more brown. They both had cozy flannel backings which Valerie machine-embroidered labels on. A great idea!
Valerie said the patterns were a type of "Storms at Sea".
On mom's quilt she chose "Oriental Clouds" pantograph.