Hollie brought me this quilt top to make up for her.
She doesn't use a pattern but creates as she goes,
and I think she did a swell job, incorporating circles
into the blocks! She also tea-dyed some of the fabrics to bring them to the right shade of beige.
I admire her courage!
For quilting, I just circled around the circles, meandered in between, put some bubbles in the inner border ( to match the bubbles in her binding fabric), and then double piano-keyed the outer border.
My first "event" in my new studio was held last Sunday, with a group of fellow stand-up machine quilters (otherwise known as Longarmers).
We try to get together every few months to share what we've been up to, to discuss our machine quilting issues, and mostly be inspired by one another! And that we were!
We also try to fit in a fun activity at our meetings, and this time it was stamping on fabric. Along with the commercial stamps we had, we also tried making our own "linoleum block" stamps, carved out from an eraser-like material. That was a new experience for most of us! We experimented with stamping ink and silkscreen ink (with the use of a brayer), fabric paints and acrylic craft paints with brushes. It is a great to try new things to create with!
Here are a few of the things I tried.
This is the snowflake stamp I carved out of the linoleum block.
These are stamps I made out of thin craft foam sheets (sticky one side), which were then applied to thicker pieces of foam (I had cut up a foam play mat which I had used as a fatigue mat). The sticky foam part did not work that well, as the paper backing didn't come off very easily, but once I find out what kind of glue to use, these make a great inexpensive stamp!
Another stamp made out of the craft foam.
And here I practiced the letter "G" from a purchased stamp.
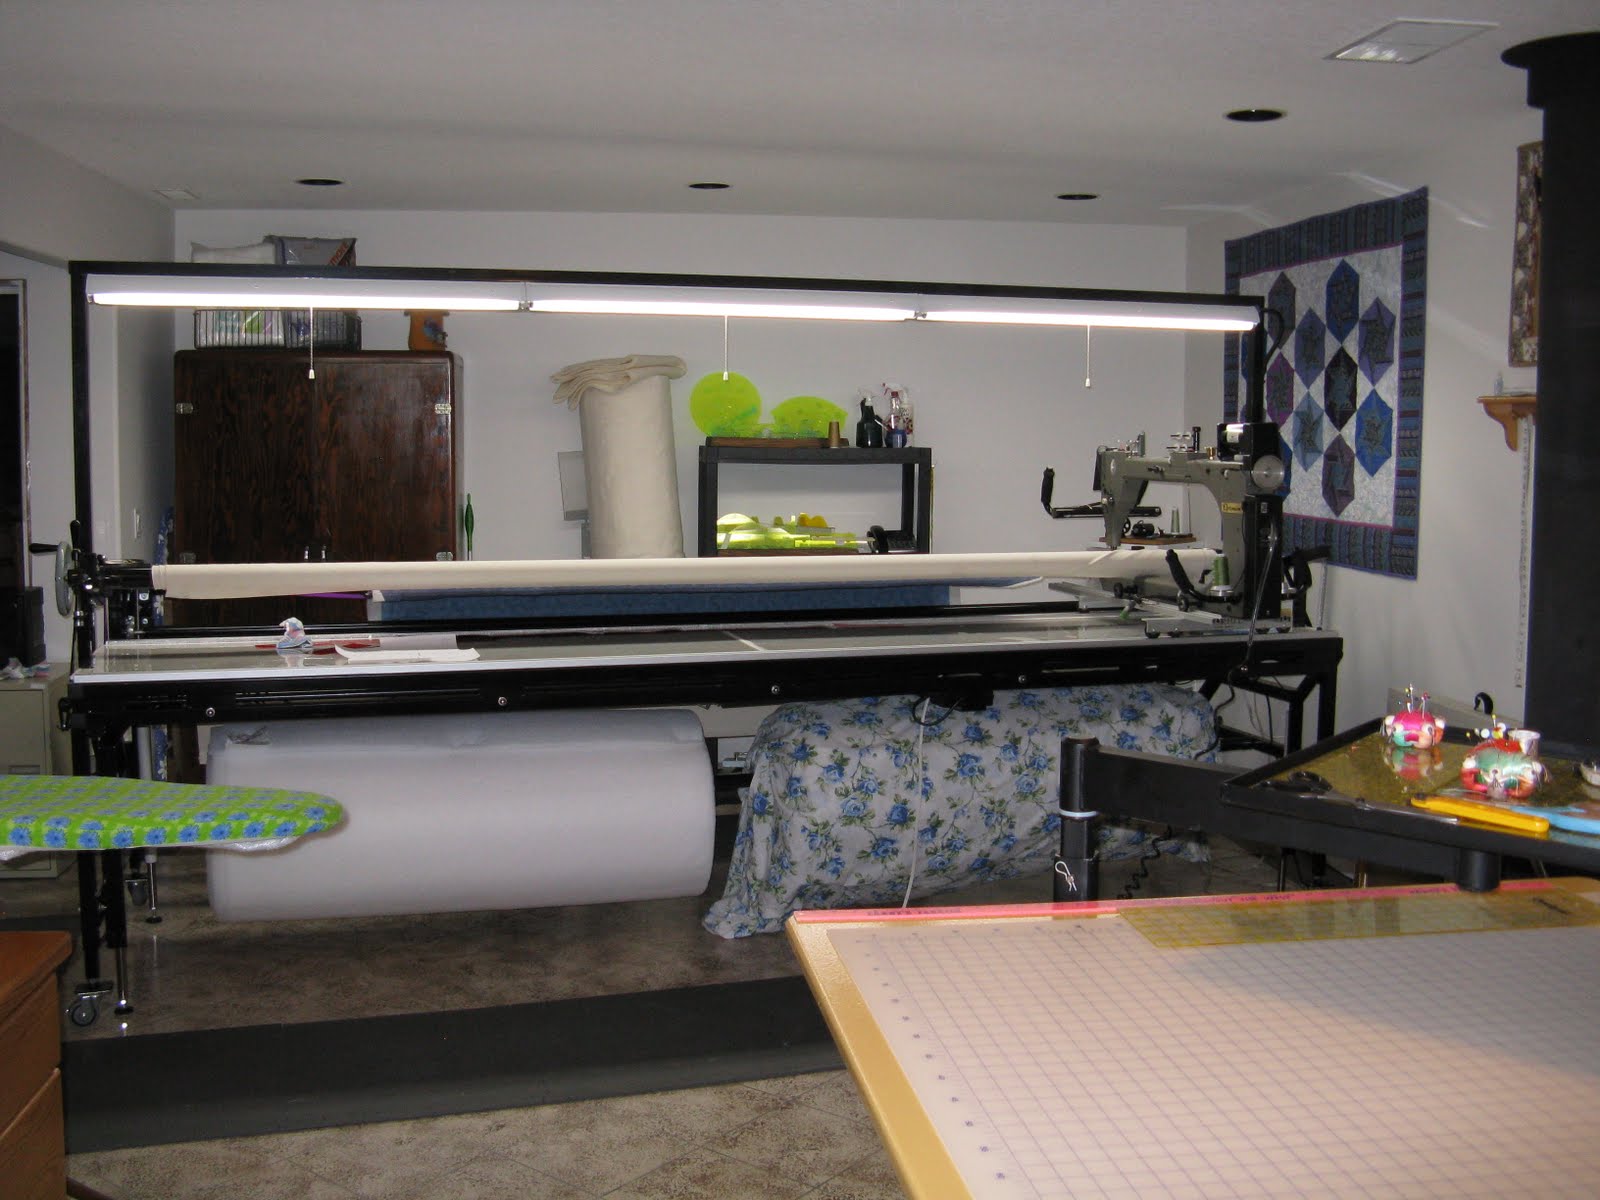
Well, over the past week, I have been moving into my new studio space! I am exhausted! Here are a few progress photos.
This is a photo of my husband welding a frame to support my new cutting surface. He's been working hard to help me out! He's also welded up a set of castors to bolts that I can put on my quilting machine, so I can roll it out of the way when I need to.
This is the finished cutting table. We put it on an old drafting table base that we acquired several years ago, and finally it has come in handy! It also has a swingarm little side table that was meant to support a computer monitor, but I find it a handy place to store my cutting tools, scissors and pins.
This is an old wardrobe my husbands grandfather or great-grandfather built. I plan to store my client quilts in it. I painted it white inside to make it look fresh and clean.
This is a new sewing area. My brother had given me a couple of cabinets that used to house his videos and support his t.v. With a few minor alterations and a new top, it makes an awesome sewing desk! And inside is a turntable shelf that will hold my threads.
It makes me feel good when I finally use something that I've saved for years!
And last but not least, my quilting machine was set up with the help of our sons who visited last week.
My Quilting group and I recently worked on a Take 5 quilt pattern, one of those quick-cut and easy-sew patterns.
It gave me an opportunity to use up some fabrics in my stash, pink and blues with gardening themes. I actually made the twin size quilt, but then divided the blocks to make one crib-sized quilt and one square wallhanging/tablecloth.
I'll eventually just stitch an all-over design across them.
I recently put this quilt top together for an upcoming beginner class I want to teach.
(Okay, so I broke my own rule, not to post a quilt that I haven't quilted yet, but I'm only planning to do an all-over on it, so it's not a big deal).
The initial pattern is called the "Balance of Nature Quilt" by Jessica Levitt, from the Windham Fabrics website. I had just under a yard of focus fabric to utilize, so I had to make some adjustments to make it fit.
This one will be fairly easy for a beginner to accomplish, while learning how to use a rotary cutter and ruler!
Most fabrics are by designer Joel Dewberry (Westminster Fibers), and I picked up a few fillers from Debra at Flamingo Quiltworx (see favorite blogs). These are not the usual colours I tend to go towards, but it will look good in my new studio.
Lovette brought me these two tops to quilt up for her.
The simple rail fence is sweet with "Feathered Garden" pantograph stitched across it.
The Froggy Quilt is for her grandson, with the fabric choices just perfect. I just love the applique!
I echoed around the frogs, stitched some pond water around them, and finished the quilt border with a row of lilies, lily pads and bulrushes. I should have picked a better section to photograph, this one isn't as nice as some others!
 Hollie brought me this quilt top to make up for her.